One of Navigatrix strength is that it just works out of the box, without the need for constant updates and patches. However, you may want to customize some of its features and/or to install additional software. To do so, it helps to understand a little about how Navigatrix is set up and where its various components can be found.
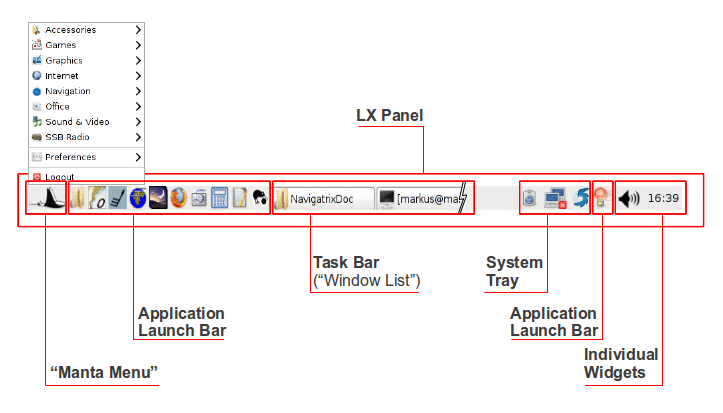
The core of Navigatrix is a Unix flavor called Linux and among the available sub-flavors of Linux Navigatrix is based on Ubuntu. Naked Unix interacts with the user through a command line interface (think “DOS terminal window” in Windows) and Navigatrix runs what is called a "desktop environment" on top of the command line interface to provide a Windows-like user interface (tuned for simplicity, speed, and robustness which makes it look a bit different). The desktop environment Navigatrix uses is called the LXDE (for “Light X11 Desktop Environment”, X11 being a “window standard” under unix) which is open source software designed specifically to be very light-weight (i.e. being spartan in its use of system resources). LXDE is started when you boot Navigatrix and it provides the desktop interface, the panel at the bottom of the screen with menu (the manta symbol - equivalent to the Windows "Start" menu"), application launch bar, task bar (windows list), and a system tray. All of these will all look familiar to Windows users. It relies on Openbox (a subsidiary program) as a window manager which renders the windows and menus that applications need for their user interfaces. In addition, it uses PCManFM as a light-weight file manager with a similar look and feel as the Windows file manager.
You can customize most elements of LXDE (e.g. appearance, what short-cut icons to show in the application launch bar) by right-clicking on the corresponding element and then choosing the relevant "Settings" item. The resulting dialogues should be largely self-explanatory.
Note that the application icons in the Application Launch Bar are different from the Navigatrix-default because the screenshot was taken with a customized version of Navigatrix.
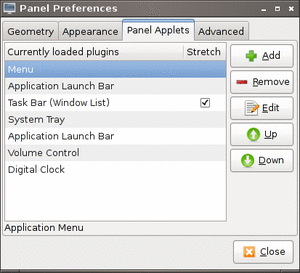
The picture below shows an example of the overall Panel Preferences dialogue (right click on any section of the panel and chose ).
To change the appearance and behavior of windows (colors, placement of controls, border sizes, ...) you can use the Openbox configuration manager which is available under the .

Other appearance settings (e.g. widget style, icon theme) can be adjusted under .
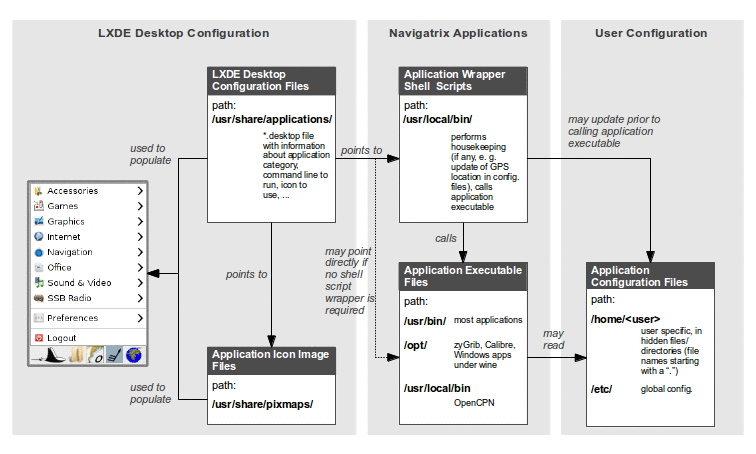
An important aspect of LXDE is how it provides access to the applications that come with Navigatrix (or others which you may install). The figure below shows an overview of how the different bits and pieces interact in this context.
Applications under Navigatrix are executable files (think DOS/Windows *.exe) that reside in three different directories (see box “Application Executable Files” in the figure above):
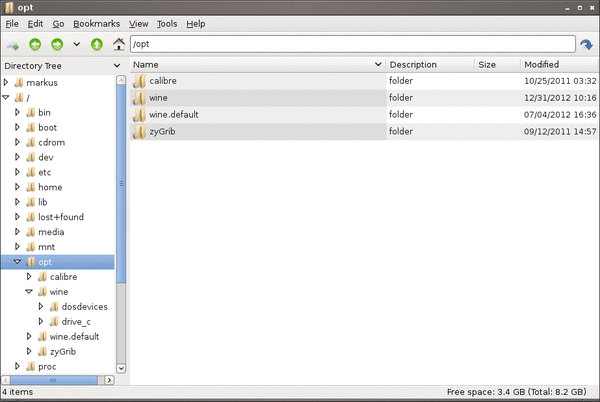
When you call many of these applications via the Manta Menu, Navigatrix does a little additional housekeeping prior to actually launching the application executable file. For example, Navigatrix may update the applications configuration file with your latest GPS position (see ”GPS and Navigatrix”). This housekeeping is done by shell scripts (think Windows *.BAT files) that provide a “wrapper" around the actual application. These shell scripts are stored under /usr/local/bin/ (see box “Application Wrapper Shell Scripts” in the figure above).
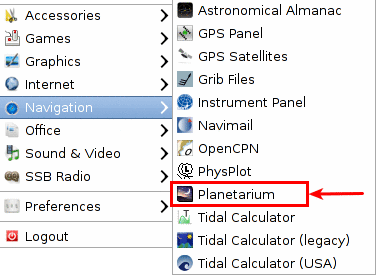
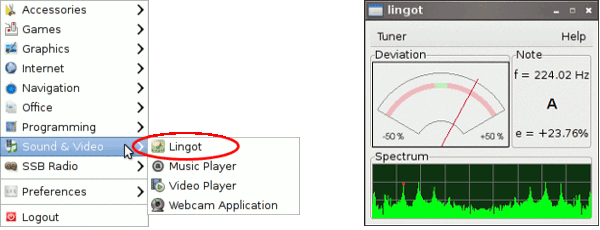
To illustrate this, let’s look at the Planetarium application that can be accessed via Manta.
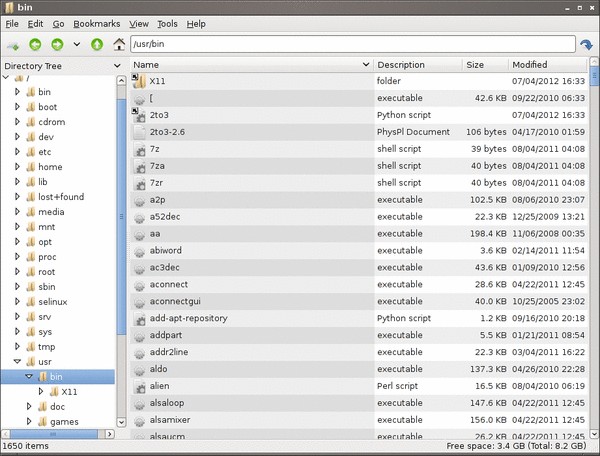
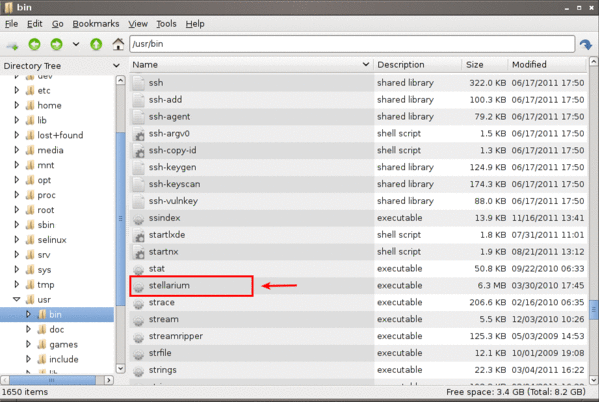
The Planetarium application shows where stars and planets can be seen in the sky from a chosen location and at a chosen time. By default, the time is the current system time in the current time zone (these can be adjusted under ). The location can be picked from a list of locations which the application reads from a configuration file. The actual application executable is called stellarium and resides under /usr/bin/:
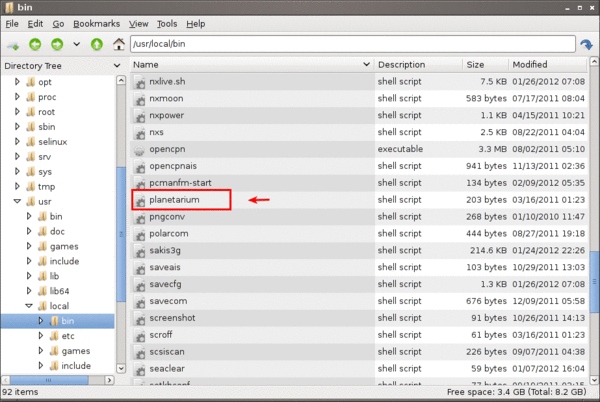
However, when you click on item in the Manta Menu, you actually call a shell script called planetarium, that resides under /usr/local/bin/:
The contents of this shell script is relatively simple (you can look at it yourself by right-clicking on the planetarium file and choosing ). Note that the numbers in front are simply line numbers that are not part of the script. There is no need to understand the details of the script but it helps to illustrate the concept at a high level.
Line 1 simple defines that this file is a shell script. Lines 2 and 3 then apply some clever manipulation to insert your most recent GPS position in one of the configuration files that Stellarium reads when it starts up. Line 4 finally launches the stellarium application executable which will now read the updated configuration file and show you the sky as it looks from your most recent GPS position. Navigatrix does this kind of “position housekeeping” for quite a few applications - a very handy feature on a computer that is used for navigation on a moving vessel.
The link between the application wrapper shell script and the Manta Menu (or between the application executable and the Manta Menu for applications that don’t have wrappers) is established via so called desktop configuration files with the extension .desktop. These reside under /usr/share/applications/. One such file exists per application that is to be accessed via the Manta Menu or the LX Panel’s launch bar. The figure below shows the /usr/share/applications/ directory with Stellarium’s desktop configuration file highlighted. Note that for these files the file manager displays not the actual filename (which in this case is stellarium.desktop) but the application title that is defined in the file (which is “Planetarium”, see below).
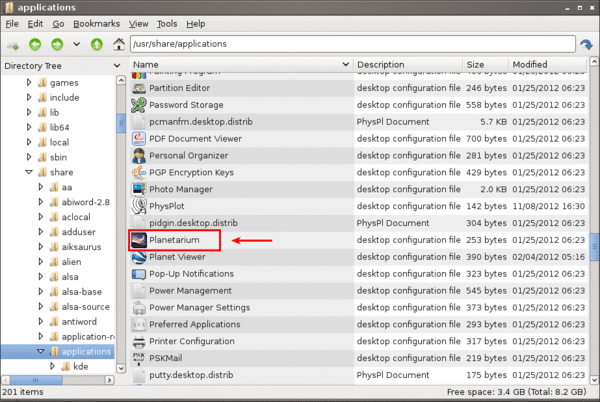
If you open the file manager, go to /usr/share/applications/, right-click on “Planetarium”, and choose , you will see the filename stellarium.desktop displayed in the editor's title bar:
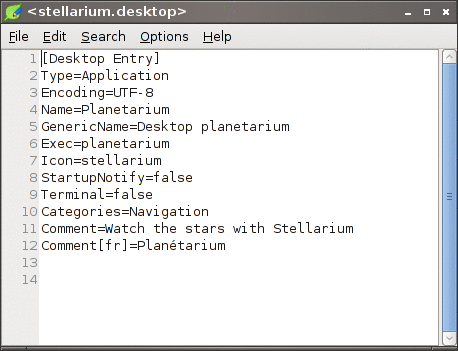
The first three lines look the same in all the desktop configuration files in Navigatrix:
The next entries are specific to Planetarium / Stellarium:
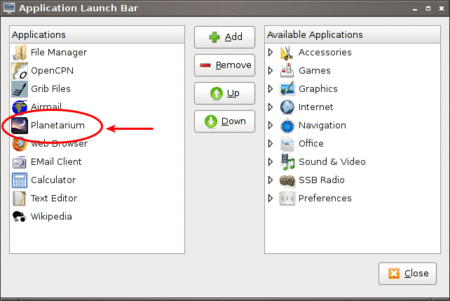
Once you have created a desktop configuration file for an application under /usr/share/applications/ (or usr/local/share/applications/ which is a good place to put desktop configuration files you may create yourself in order to keep them apart from the ones that come with Navigatrix), the application will show up in the Manta Menu and also be available in the configuration dialogues for the Panel’s Launch Bar. Note that the list of applications on the left is different from the Navigatrix-default because the screenshot was taken with a customized version of Navigatrix:
For the sake of this Short Introduction we can distinguish three principal ways to install additional applications under a Linux-based system like Navigatrix:
Under Linux, software is organized in “packages” which are maintained in repositories on central serves. Linux systems (such as Navigatrix) come with a Package Manager that allows you to interface with these repository servers and to manage adding and removing software to and from your system in an “orderly fashion.”
This is a bit different from what you may be used from a MS Windows environment. There, a software application is typically distributed by a commercial vendor as a self-contained collection of files which are shipped on a CD/DVD together with some executable installer program that can be run to install the files in that collection to run on top of MS Windows as a new application. You basically trust the vendor that installing its application in this manner will not negatively impact any existing functionality on your system and not be at logger heads with other applications you have installed.
Linux takes a slightly different approach to software installation. Applications (which have typically been developed as open source projects) will be added to a central software repository by “the community” or commercial distributors and are available for download and installation from designated repository servers. These repositories also maintain all the dependencies between different packages. When you request an application from a repository the process (which is explained further below) will automatically check if there are any subsidiary packages that the requested application relies on and which have not been installed on your system yet. It will then include these subsidiary packages into the download and the installation. This more centralized approach to software distribution somewhat reduces the risk of different applications causing each other trouble. If there is a chance for conflict (for example, because two applications require different versions of the same subsidiary package) you will be notified of the issue prior to the installation and can at least make an informed choice.
This may all sound complicated but is actually quite straight forward once we look at the tools involved and an example further below.
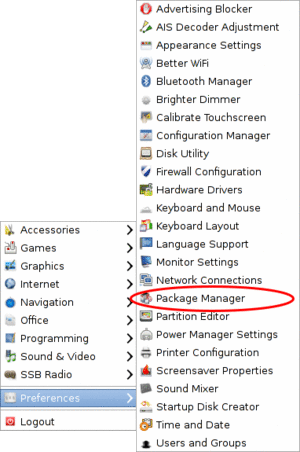
The tool used to connect to software repositories and to download and install software packages is the “Synaptic Package Manager” which is accessible from the under
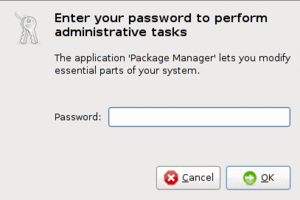
To run the Package Manager you will need administrative (“root”) rights. When you launch the application you will therefore be prompted for the password that you defined when installing Navigatrix (provided you haven’t changed it since then).
A word of caution here: With great power comes great responsibility. The Package Manager allows you to perform changes to the core of your system. You can render your system unusable by using the Package Manager carelessly. This should not be an issue as long as we’re simply talking about adding, updating or removing applications and are not messing with the system core. Just make sure you understand what you are doing in each step when working with the Package Manager.
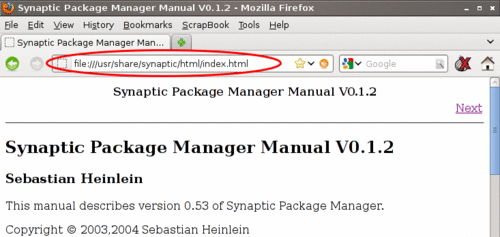
There is detailed documentation for the Package Manager that comes with your Navigatrix installation. We will therefore only illustrate its use by walking through a simple installation example which should be sufficient to get you started. For more detailed information you can access the offline manual by typing file:///usr/share/synaptic/html/index.html in the address bar of your web browser:
But now back to the Package Manager's main window which will open up after entering your password:
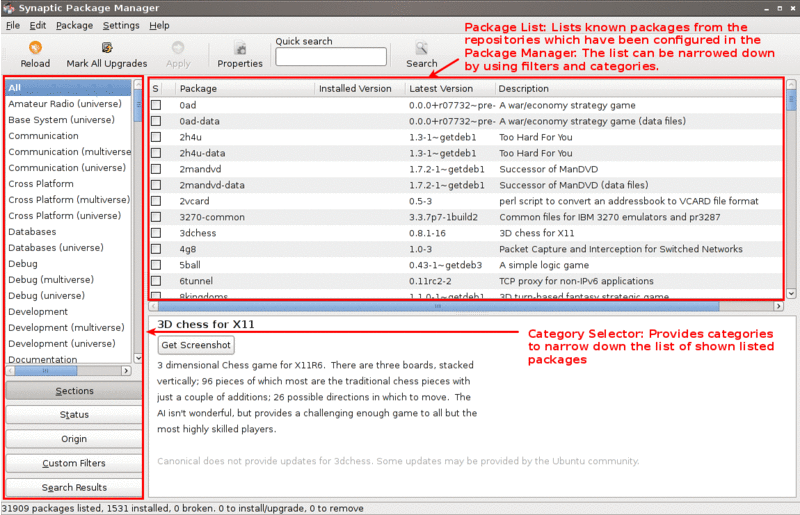
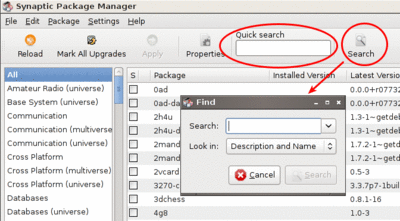
The Package List on the top right shows the software packages which are available from the repositories that are configured in the Package Manager (see the manual for details on how to configure additional repositories should you ever need to do so). You can narrow this list down by using the Category Selector on the left of the main window. Alternatively, you can search for packages by either entering a search term in the “Quick search” box on the toolbar or by clicking the “Search” icon to the right of the Quick search box:
For our example, let’s assume we want to install Lingot, a handy little musical instrument tuner that picks up a tone via your computer’s built-in microphone and shows you whether you’re on or off tune. Its interface looks like a guitar tuner but it can be used for any instrument - including the on-board piano. You will need an Internet connection to try this. The application is very small (download size < 100 kB) so even a marginal connection should do (if you have one of those you may wish to skip the refresh of the Package List in the next step).
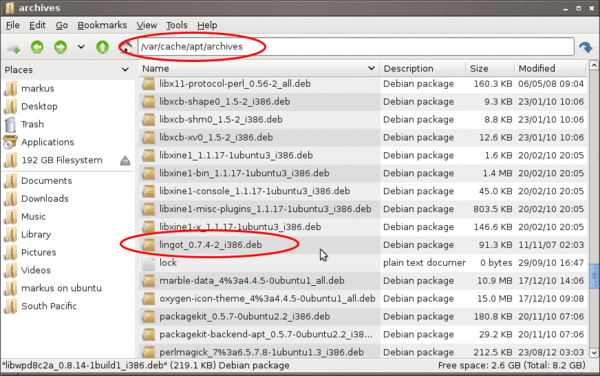
Before we go and look for Lingot in the Package List it is advisable to reload the list of available packages from the repository servers. Otherwise what you see in the Package Manager’s Package List may be out of date and not accurately reflect what's on the server. To update the list of available packages simply press the “Relaod” button on the toolbar:
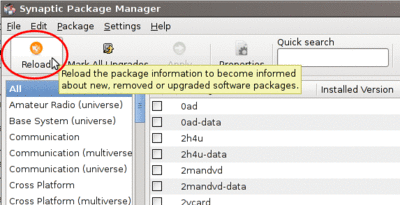
This will take a moment and show you a progress window while it is downloading the latest package information.
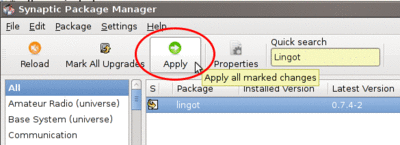
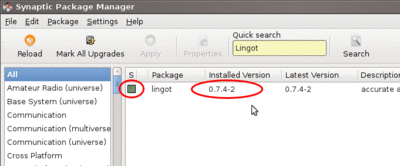
Once it is done type “lingot” (without the quotes, capitalization doesn't matter) in the Package Manager’s “Quick search” bar. Make sure that you have selected “All” in the Category Selector on the left in order not to filter out Lingot from the search results. The Package list will now only show you the one matching entry for Lingot:
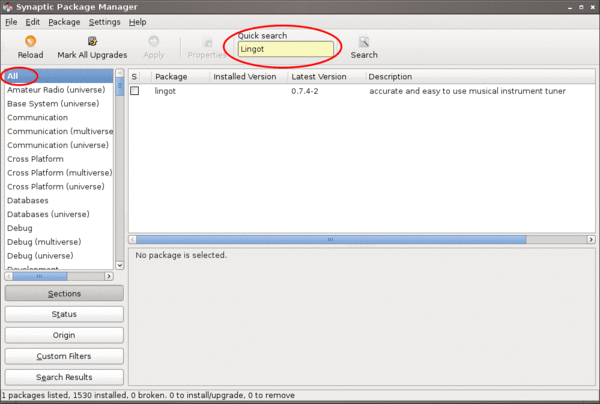
The left-most column you see in the Package list window (the one labeled “S” - assuming you haven’t changed this yet under ) shows the package’s status. The empty little box you see in the example indicates that this package has not been installed on your computer yet. (For a list of the possible stati and their corresponding icons you can look under .)
The empty column between the status indicator and the package name indicates the level of support provided for this package. If it’s empty it means that you cannot rely on this package being maintained in the repository in the future but this doesn’t bother us in this example.
The next columns simply list the package name, the installed version (in case the package displayed is already installed on your machine), the latest available version in the repository, and a short description.
To see more information about a package, simply select it in the package list and click on the Properties button in the toolbar:
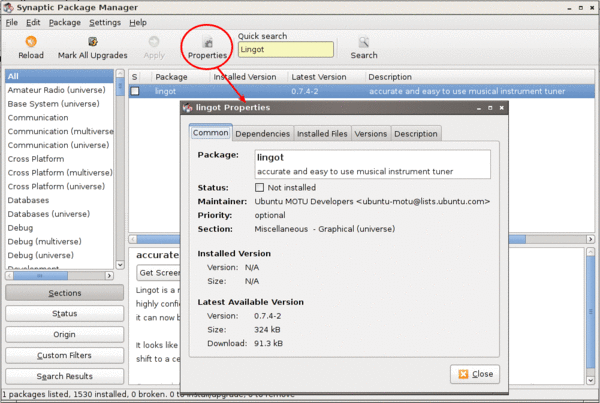
The tabs in the properties window should be self-explanatory. It’s worth looking at the “Dependencies” tab which lists all the other packages that Lingot will require to run. These are typically software libraries that provide basic functionality shared by many applications. Most of these will likely already be installed on your system. If not, the Package Manager will automatically include them in the download and install them together with Lingot.
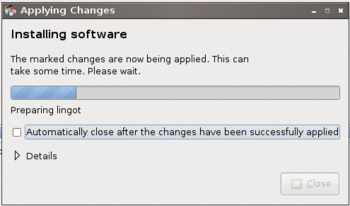
Now let’s close the properties window and proceed with the actual installation. This is a two-step process:
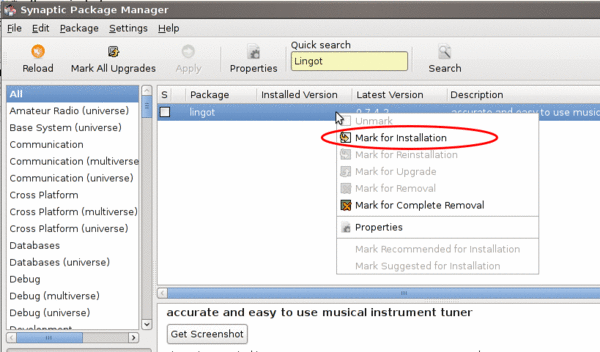
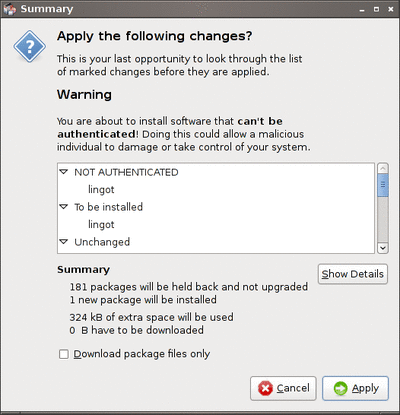
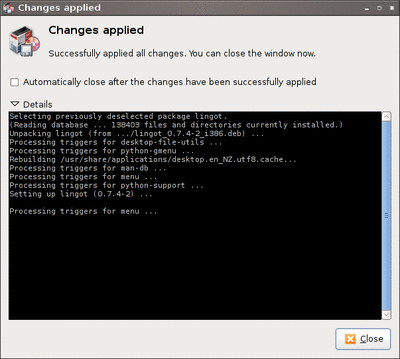
That’s it. You should now see Lingot as an entry in the under :
A few comments before you get out the guitar / ukulele or whatever you use on board for musical entertainment:
Coming soon, currently under construction ...